
If you know the method correctly you can design you own ribbon less than 10 minutes, even though it seems complicated task.
In this tutorial I’m use CorelDraw X3. Although you can use any newer or older versions of CorelDraw software.
(I’m not going to explain every basic steps since I already post about those techniques in my past tutorials.)
First step is open CorelDraw and create a new document.
Select Bezier Tool

Draw a shape like this

Select Shape tool and select the shape using it.

Without deselecting the shape press convert line to curve button.
Again without deselecting the shape press Make Node Symmetrical button.

Now your shape should be look like this.
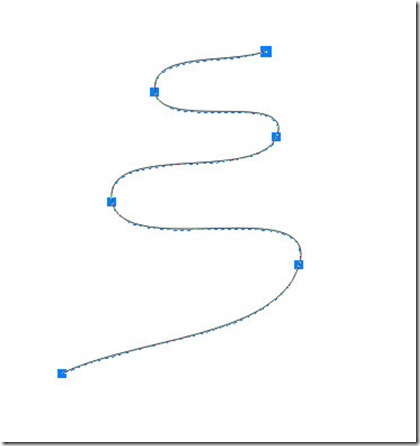
Change the shape of our curve line using curve tool.
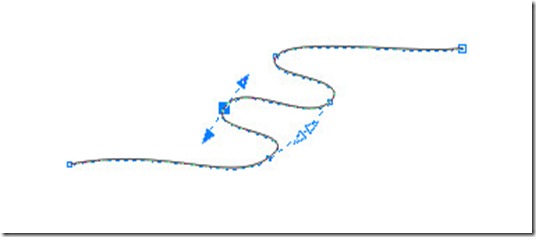
Now select the Interactive Extrude tool. Give a 3D effect to the curve line.

You should get something like this.


Now select the shape using pick tool. Press Break Extrude Group Apart at the Arrange menu.

Now you can separate the curve line and shape we just made.

Delete the line, since we don’t want it anymore.
Select the shape we have.
Press Ungroup button at the menu bar.

Select an any shape. Click on the Fountain Fill Dialog Button.

Select a one of the Preset called Cylinder Grey – 01 form the Fountain Fill Dialog Box.

Make the other settings like this.
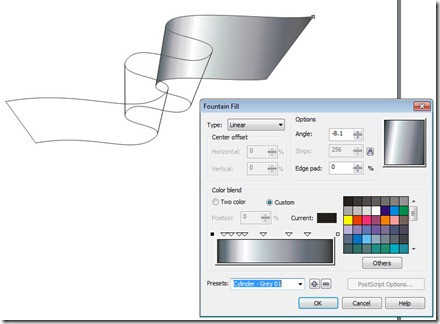
Now you can fill the other shapes using the same preset we made above. Just drag and drop the Fountain color sample from the bottom of coreldraw to each of shape like this.
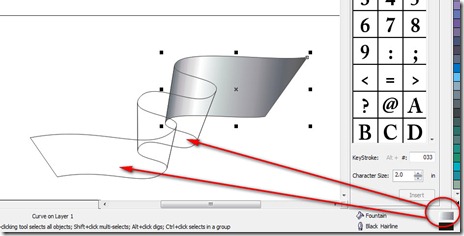
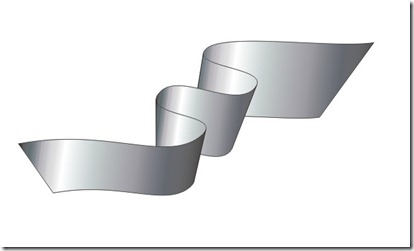
Now we have a shape closer to a ribbon. Still we have few steps to go.
Select the curve tool and add a new node the end of ribbon.

Drag the node to little bit right side like bellow.

Press Make Node A Cusp by clicking the that button. Now you can change the shape to something like this. (Use arrow heads)

Now we finished a one side of the ribbon.

To make other half, make a duplicate of the ribbon by clicking + sing of the num pad. (Make sure num lock is enable)
Drag it to right side.

Use mirror tool to flip it.

Drag it to little more further right side.

Draw a rectangle connecting to shape. Fill it using same color pattern.

Select the 3 shape shown bellow and Weld it using Weld Button.
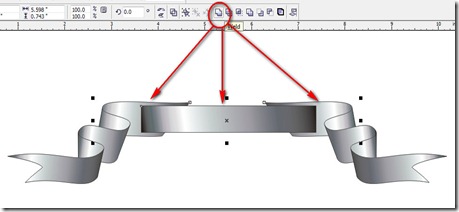
Select the shape tool and delete unwanted nodes. Shape it further more.


Fill the middle of the ribbon like this.

Remove the out line by Right Clicking on the “X” mark on the color palate.

Now you should have some thing like this.
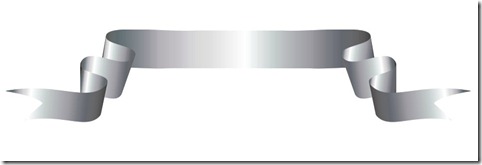
Add suitable background color.

Ribbon is finish.
We can change the curve of the ribbon by just changing the order of the shapes. Like bellow.


We can use any color gradient using fountain fill dialog box.

Experiment with shapes and try to make different ribbon patterns.
Thank you for reading.
Here is the CorelDraw file for download. Download