Showing posts with label Vector Tutorial. Show all posts
Showing posts with label Vector Tutorial. Show all posts
Monday, June 20, 2022

Sunday, October 19, 2014
Corel Draw Sticky Notes Tutorial

In this tutorial you will learn how to design a sticky note in CorelDraw. I’m using CorelDraw X7 version throughout this tutorial.
First create a new document.

Then draw a rectangle using Rectangle tool.

Choose Shape tool.

Right click on the rectangle and select Convert to Curve from the menu.

Now select all nodes of rectangle and press Convert to Curve button at the tool bar.

Now click out side the rectangle to deselect.

Then select a node. Now you can see two arrow heads appears on the node. Use those arrow heads to make sticky note shape.


After that choose Interactive Fill tool.

Drag and drop across the rectangle like this.

Fill small square at the both side of gradient with yellow color.

Double click on the gradient line to create another two fill squares.

Mix little bit of white to lower square. To do that select the square, hold down Ctrl button and click on white color at the color palette. One click will not be enough. Eight clicks did the job for me.

To remove outline select the sticky shape using pick tool and right click on the X mark at the color palette.


Then I’m going to add a drop shadow effect to sticky node shape. To do that select it using pick tool. Press “+” sign key at the num pad. This will make a duplicate copy on top of yellow shape. Fill with it black. Press and hold Ctrl button and press END button to send it back of yellow shape. Move it little bit right and down sides.

Now using Shape tool push top right hand side corner to the inside of yellow shape. Do the same for the bottom left corner.

While black shape is selected choose Convert to bitmap form the Bitmap menu. Press OK.

Select Gaussian blur from the Bitmap effect.

Select radius to 10px and press ok.

Now select Interactive Transparency tool from the tool box. Choose Uniform transparency from the transparency tool menu. Set transparency to 20%.

Now draw little rectangle shape on top of sticky note.

Fill it with 20% of black. Remove outline.

Select Interactive Transparency tool. Set transparency to Uniform, Blending mode to Multiply and transparency to 38 at the menu bar.

Type some text using hand written fronts. This is the final result.

To download sticky note CorelDraw X7 template click the lick below.
Friday, October 10, 2014
CorelDraw Tutorial about Drawing Red Angry Bird (Video)

In this tutorial I'm going to show you how to draw a red angry bird using CorelDraw vector graphic software. I'm using CorelDraw X4 version throughout this tutorial. Basic knowledge about CorelDraw required to follow this tutorial.
You can download the final graphic using following download link.
Thursday, October 2, 2014
CorelDraw Logo Design Tutorial (Pure Water)
In this tutorial you are going to learn how to design a logo using CorelDraw. I’m use CorelDraw X4 throughout this tutorial. Even though you can use any corel draw version since CorelDraw 12.
.jpg)
In this tutorial I’m only going to use font styles and basic water drop shapes. Basic knowledge about coreldraw is enough to follow this tutorial.
Step 1:
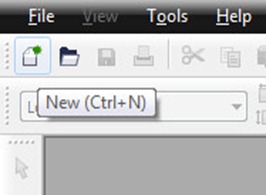
Open CrelDraw and click on the new Document button to open a new document.
Select Type Tool. Click on somewhere on your canvas. Here I type "Pure" and choose 'Cooper Std Black' as font. Change font color to deep blue color.

Step 2: Making Water Drops
Choose Pen Tool form tool box. Draw a rectangle on top of letter "P" as bellow.

Now choose Shape Tool from the tool box. Right click on the rectangle and choose "To Cure" from the menu.

Now click on one of node. Two handles will be appear on that node. Using those handles we can make water drop shape from our rectangle.


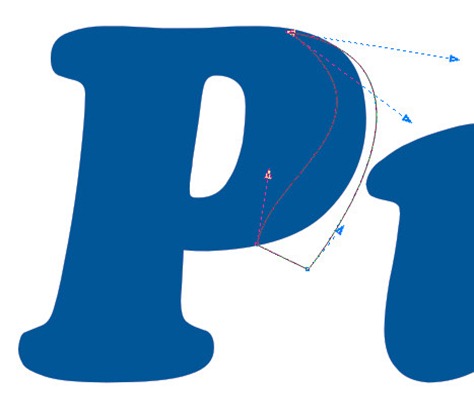
This is our water drop.

Fill it with light blue color.

Remove out line by Right Clicking on "X" mark on the color palette.
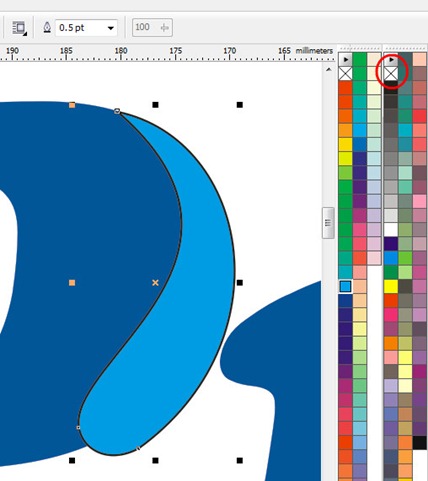
Select water drop using the Pick Tool. Then press "+" key sign at NUM Pad section on the key board. This will make duplicate of water drop. Change it's color to white.
Resize it to small size.
Long double click on it to appear rotation handles. (Short double click will change pick tool to Shape Tool) Rotate as follows to make it look like reflection.

Change shape it accordingly using Shape Tool. Use Mirror Horizontally button to mirror it.

Choose Transparency Tool and give Linear transparency to reflection shape.

Use same technique to add water drops to every other letters.
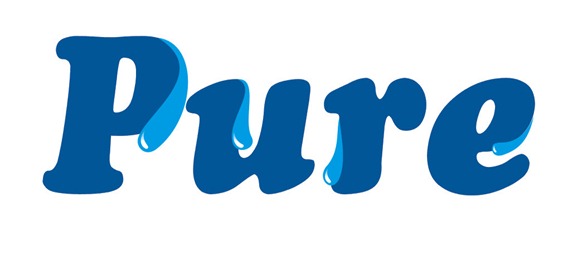
This is after adding water drops to every other letters.
Step 3:
Now I'm going to add few more water drops to outside the word ‘pure’. Technique is same. (Use Pen Tool to draw rectangle. Shape it using Shape tool.)


Finally I add Radial Gradient to water drop using Fountain Fill Dialog Box.

I add reflection to the logo. To do that group the logo. Convert it to bitmap using Bitmaps menu. Mirror it using mirror button at toolbar. Then use Interactive Transparency Tool to add Linear transparent effect.

Here is the final result.

In this tutorial I’m only going to use font styles and basic water drop shapes. Basic knowledge about coreldraw is enough to follow this tutorial.
Step 1:
Open CrelDraw and click on the new Document button to open a new document.

Select Type Tool. Click on somewhere on your canvas. Here I type "Pure" and choose 'Cooper Std Black' as font. Change font color to deep blue color.

Step 2: Making Water Drops
Choose Pen Tool form tool box. Draw a rectangle on top of letter "P" as bellow.

Now choose Shape Tool from the tool box. Right click on the rectangle and choose "To Cure" from the menu.

Now click on one of node. Two handles will be appear on that node. Using those handles we can make water drop shape from our rectangle.


This is our water drop.

Fill it with light blue color.

Remove out line by Right Clicking on "X" mark on the color palette.

Select water drop using the Pick Tool. Then press "+" key sign at NUM Pad section on the key board. This will make duplicate of water drop. Change it's color to white.
Resize it to small size.
Long double click on it to appear rotation handles. (Short double click will change pick tool to Shape Tool) Rotate as follows to make it look like reflection.

Change shape it accordingly using Shape Tool. Use Mirror Horizontally button to mirror it.

Choose Transparency Tool and give Linear transparency to reflection shape.

Use same technique to add water drops to every other letters.
This is after adding water drops to every other letters.

Step 3:
Now I'm going to add few more water drops to outside the word ‘pure’. Technique is same. (Use Pen Tool to draw rectangle. Shape it using Shape tool.)


Finally I add Radial Gradient to water drop using Fountain Fill Dialog Box.

I add reflection to the logo. To do that group the logo. Convert it to bitmap using Bitmaps menu. Mirror it using mirror button at toolbar. Then use Interactive Transparency Tool to add Linear transparent effect.

Here is the final result.

Click here to download Corel Draw Project file. Download.
Tuesday, September 30, 2014
Logo Design Tutorial Using CorelDraw
This is the logo I’m going to teach you. This tutorial is done in CorelDraw X4 version. But I’m sure this can be done using most of previous and newer CorelDraw versions like CorelDraw 12, CorelDraw X3, CorelDraw X5, CorelDraw X6 and CorelDraw X7 etc…
This is not very hard tutorial. Little knowledge about CorelDraw will be enough to complete this.

Draw a circle using Ellipse Tool. Fill it any color.
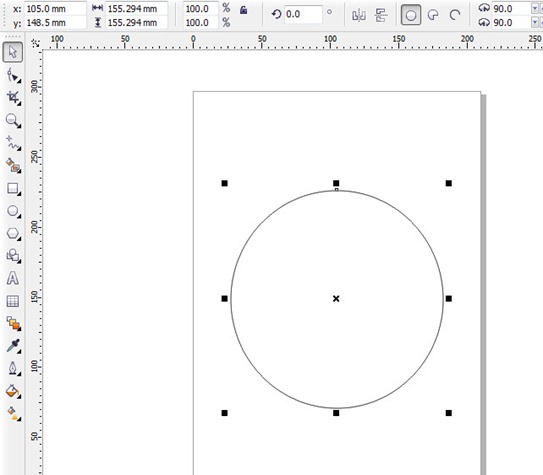
Remove outline by right clicking on X sign at color palate.

Get a duplicate copy of the circle by pressing + sign of NUM pad.
Reduce the size of the created circle holding shift key. Fill it with different color.
While pick tool is selected press and hold shift key and click on each circle to select both circle.
Now press Back Minus Front from the tool bar.


Draw rectangle using Rectangle Tool.
Select both shapes using pick Tool. Press c and press e while both
shapes are selected. (to align centers vertically and horizontally.)
Open Rotate tool as follows.

Select Rectangle and set angle to 30 Degrees. Press apply to duplicate 6 times.

Now you have something like this.

Select all rectangles by selecting pick tool and click on each
rectangle while holding shift key. Now press Weld button at tool bar to all reactangle weld into one shape.

Now select both shapes. Press Back Minus Front button. You have something like this.

Now press Break Apart button.

Select all parts except single like below. Combine all other shapes except that single part.


Select bigger part and fill it using fountain fill dialog box.

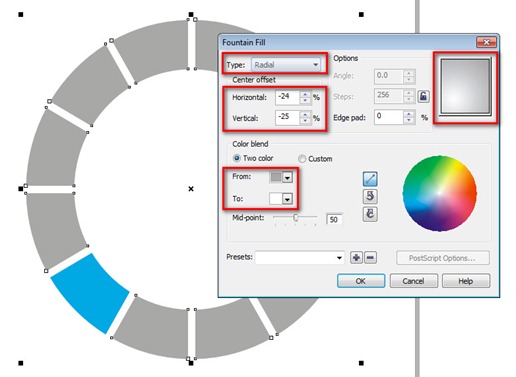

Select the bigger part and choose Extrude Tool. Make something like this by adjusting Extrude handle. Set depth to 3.
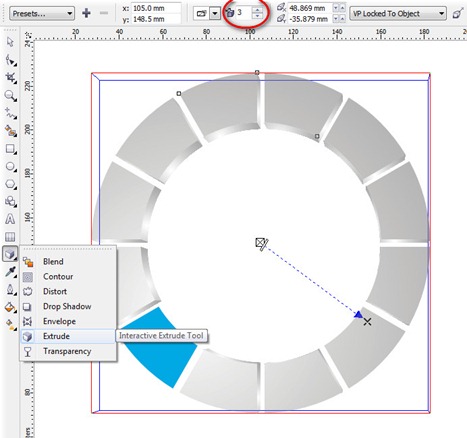
Now select blue color shape. Use Interactive Fill Tool to give it a gradient like this.


Now Select the Interactive Extrude Tool. Click on the Blue shape.
Click on Copy Extrude Properties button. Now carefully click on Extruded area on the other shape.


Now I'm going to add little bit of drop shadow.
Draw a ellipse under the logo using Ellipse Tool. Fill it with black.

Press convert to bitmap at the Bitmaps menu. Press OK for the dialog box.

Add Gaussian blur effect for the ellipse.

Radius set to 54 and press OK.

Give about 80 of uniform transparency.



Select the complete orbit and Group it. Choose Add Perspective from the Arrange menu.

Give a perspective like this.
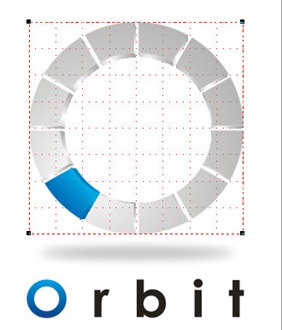

Here is the final Orbit Logo.

Click here to download the CorelDraw project file. Download
This is not very hard tutorial. Little knowledge about CorelDraw will be enough to complete this.

Draw a circle using Ellipse Tool. Fill it any color.

Remove outline by right clicking on X sign at color palate.

Get a duplicate copy of the circle by pressing + sign of NUM pad.
Reduce the size of the created circle holding shift key. Fill it with different color.
While pick tool is selected press and hold shift key and click on each circle to select both circle.
Now press Back Minus Front from the tool bar.


Draw rectangle using Rectangle Tool.
Select both shapes using pick Tool. Press c and press e while both
shapes are selected. (to align centers vertically and horizontally.)
Open Rotate tool as follows.

Select Rectangle and set angle to 30 Degrees. Press apply to duplicate 6 times.

Now you have something like this.

Select all rectangles by selecting pick tool and click on each
rectangle while holding shift key. Now press Weld button at tool bar to all reactangle weld into one shape.

Now select both shapes. Press Back Minus Front button. You have something like this.

Now press Break Apart button.

Select all parts except single like below. Combine all other shapes except that single part.


Select bigger part and fill it using fountain fill dialog box.


Select the bigger part and choose Extrude Tool. Make something like this by adjusting Extrude handle. Set depth to 3.

Now select blue color shape. Use Interactive Fill Tool to give it a gradient like this.


Now Select the Interactive Extrude Tool. Click on the Blue shape.
Click on Copy Extrude Properties button. Now carefully click on Extruded area on the other shape.


Now I'm going to add little bit of drop shadow.
Draw a ellipse under the logo using Ellipse Tool. Fill it with black.

Press convert to bitmap at the Bitmaps menu. Press OK for the dialog box.

Add Gaussian blur effect for the ellipse.

Radius set to 54 and press OK.

Give about 80 of uniform transparency.


Select the complete orbit and Group it. Choose Add Perspective from the Arrange menu.

Give a perspective like this.


Here is the final Orbit Logo.

Click here to download the CorelDraw project file. Download
Subscribe to:
Posts (Atom)
You Might Like
