Tuesday, September 30, 2014

Logo Design Tutorial Using CorelDraw

This is the logo I’m going to teach you. This tutorial is done in CorelDraw X4 version. But I’m sure this can be done using most of previous and newer CorelDraw versions like CorelDraw 12,  CorelDraw X3, CorelDraw X5, CorelDraw X6 and CorelDraw X7 etc…
This is not very hard tutorial. Little knowledge about CorelDraw will be enough to complete this.
ORBIT CO-OP LOGO CORELDRAW
Draw a circle using Ellipse Tool. Fill it any color.
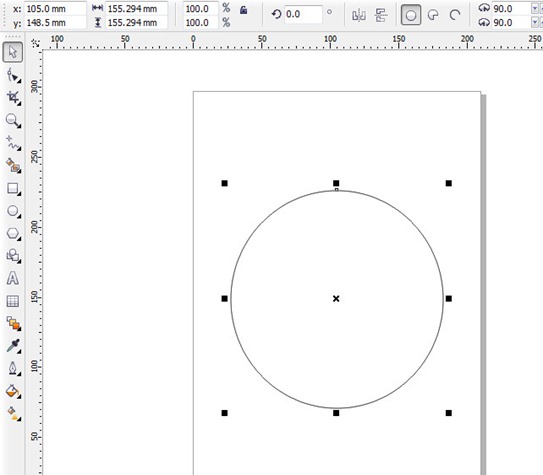
2014-09-30_145548
Remove outline by right clicking on X sign at color palate.
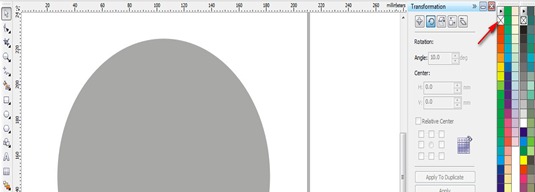
2014-09-30_150552
Get a duplicate copy of the circle by pressing + sign of NUM pad.
Reduce the size of the created circle holding shift key. Fill it with different color.
While pick tool is selected press and hold shift key and click on each circle to select both circle.
Now press Back Minus Front from the tool bar.
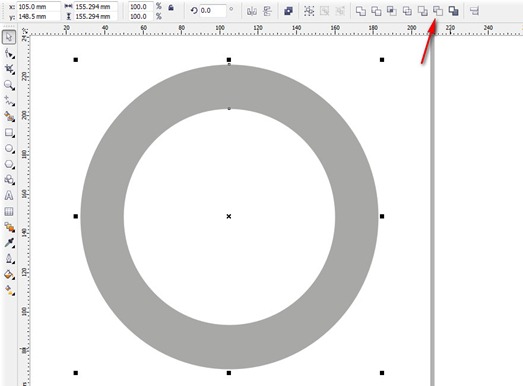
2014-09-30_151437
coreldraw logo tutorial
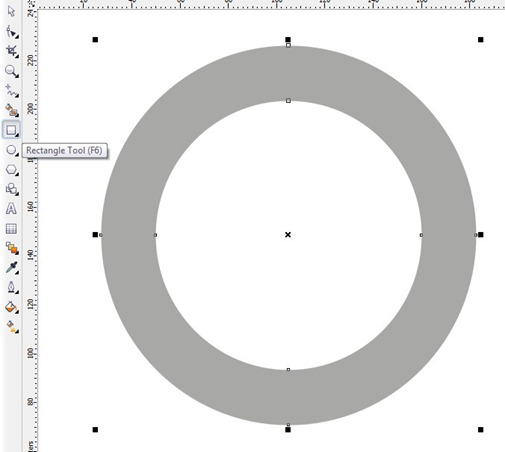
Draw rectangle using Rectangle Tool.
Select both shapes using pick Tool. Press c and press e while both
shapes are selected. (to align centers vertically and horizontally.)
Open Rotate tool as follows.
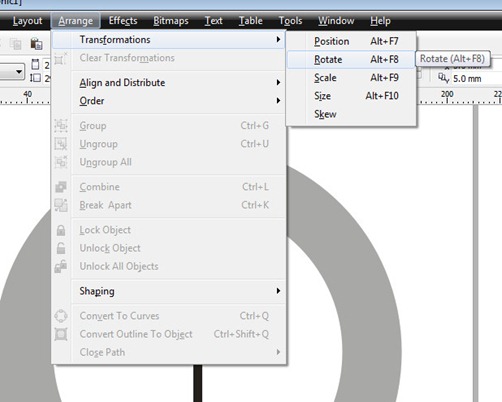
coreldraw logo tutorial
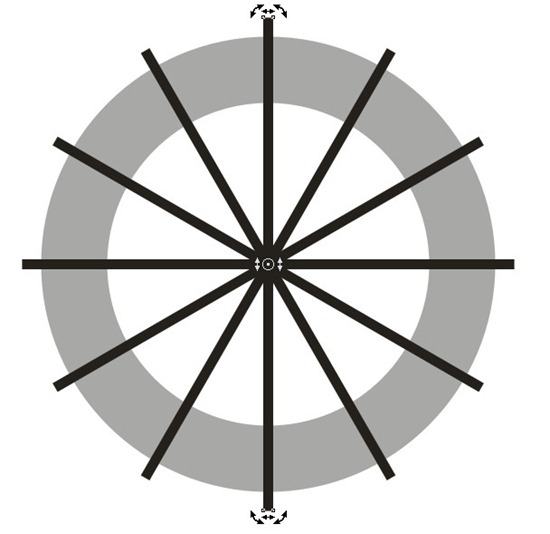
Select Rectangle and set angle to 30 Degrees. Press apply to duplicate 6 times.
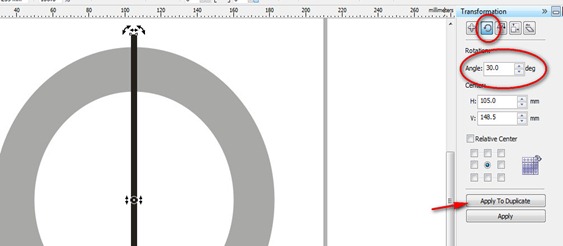
coreldraw logo tutorial
Now you have something like this.
coreldraw logo tutorial
Select all rectangles by selecting pick tool and click on each
rectangle while holding shift key. Now press Weld button at tool bar to all reactangle weld into one shape.
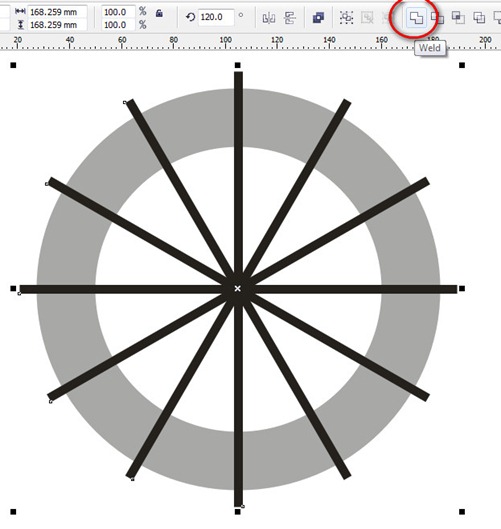
coreldraw logo tutorial
Now select both shapes. Press Back Minus Front button. You have something like this.
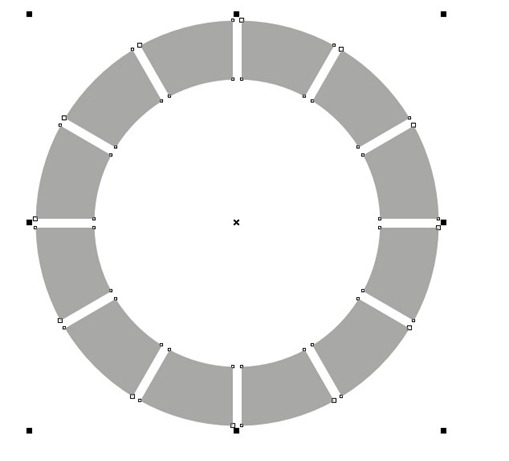
coreldraw logo tutorial
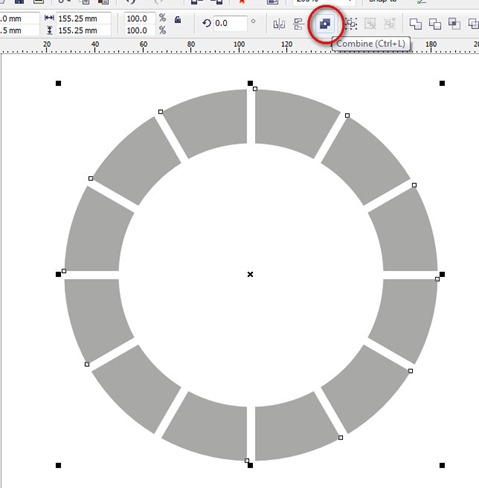
Now press Break Apart button.
coreldraw logo tutorial
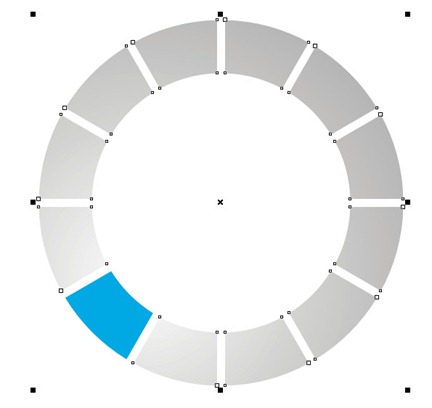
Select all parts except single like below. Combine all other shapes except that single part.

coreldraw logo tutorial
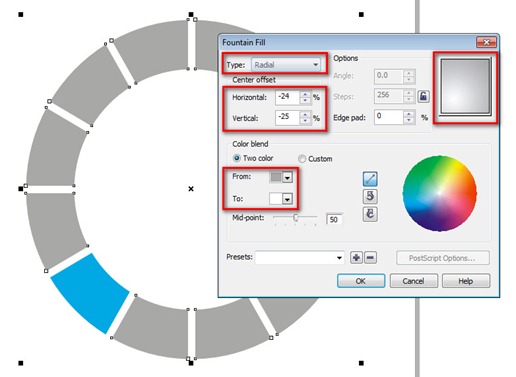
Select bigger part and fill it using fountain fill dialog box.
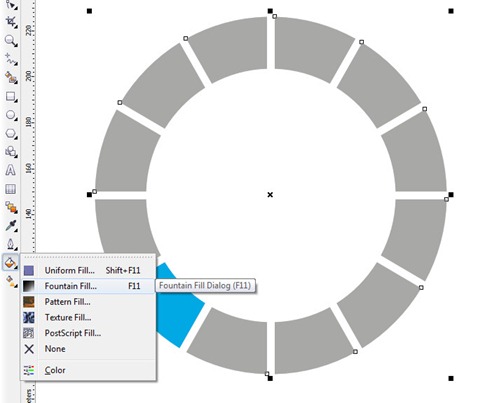
coreldraw logo tutorial
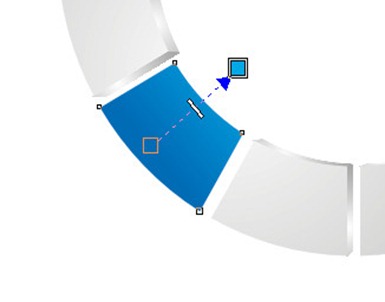
Select the bigger part and choose Extrude Tool. Make something like this by adjusting Extrude handle. Set depth to 3.
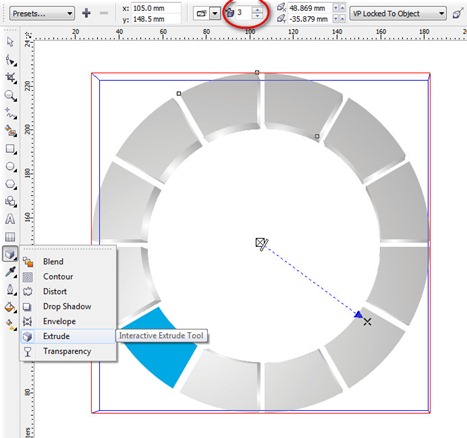
coreldraw logo tutorial
Now select blue color shape. Use Interactive Fill Tool to give it a gradient like this.
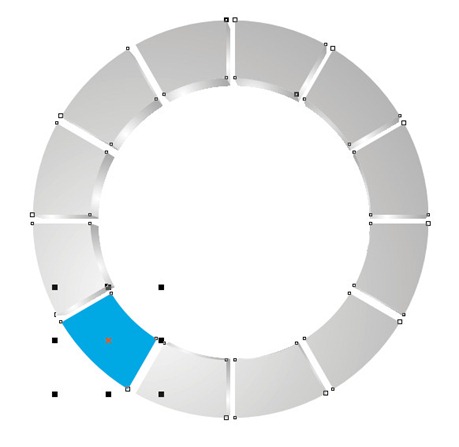
coreldraw logo tutorial
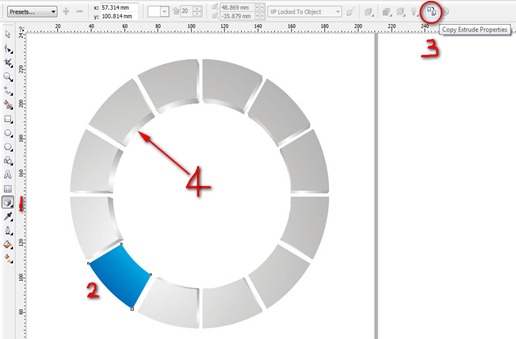
Now Select the Interactive Extrude Tool. Click on the Blue shape.
Click on Copy Extrude Properties button. Now carefully click on Extruded area on the other shape.
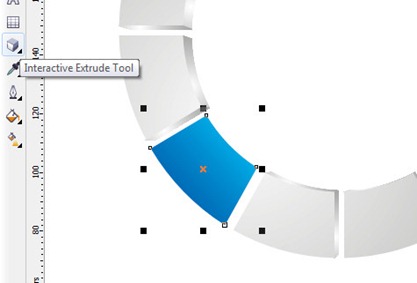
coreldraw logo tutorial
Now I'm going to add little bit of drop shadow.
Draw a ellipse under the logo using Ellipse Tool. Fill it with black.

 coreldraw logo tutorial
Press convert to bitmap at the Bitmaps menu. Press OK for the dialog box.
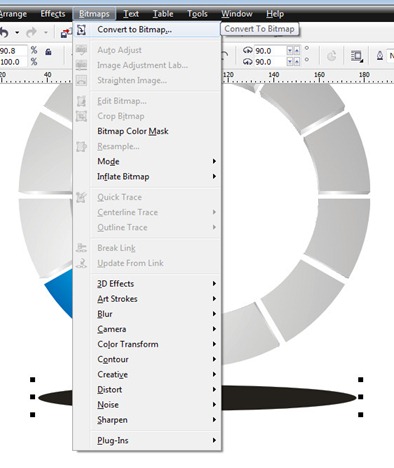
coreldraw logo tutorial
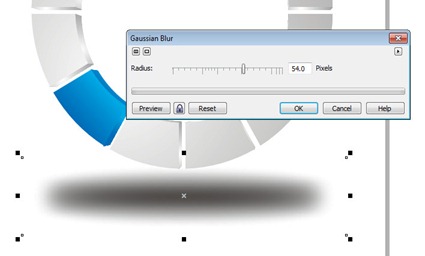
Add Gaussian blur effect for the ellipse.
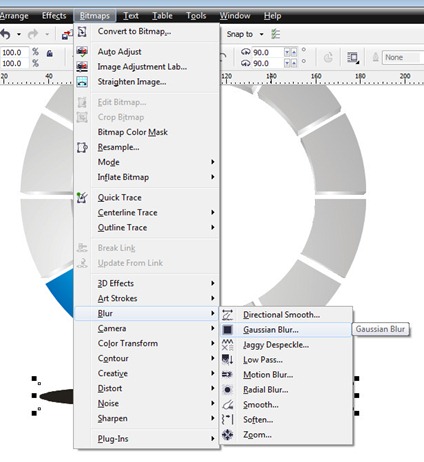
coreldraw logo tutorial
Radius set to 54 and press OK.
coreldraw logo tutorial
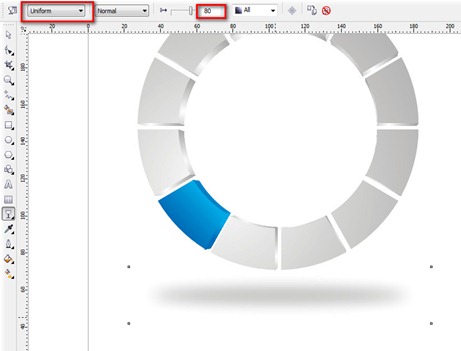
Give about 80 of uniform transparency.
coreldraw logo tutorial
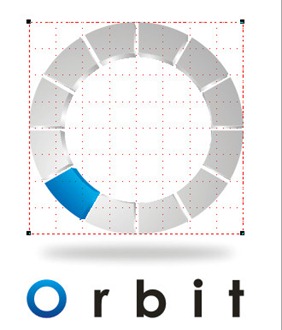
Select the complete orbit and Group it. Choose Add Perspective from the Arrange menu.
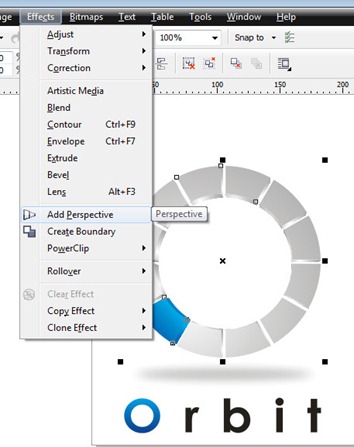
coreldraw logo tutorial
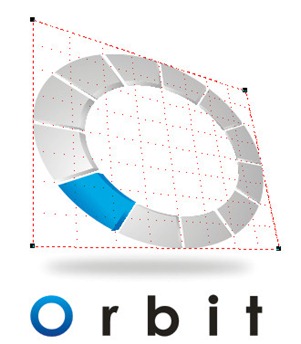
Give a perspective like this.
coreldraw logo tutorial
Here is the final Orbit Logo.
ORBIT CO-OP LOGO CORELDRAW
Click here to download the CorelDraw project file. Download

Friday, September 12, 2014

CorelDraw tutorial about how to add new color palette


When you open CorelDraw program for first time you will see default color palette at the right side of workspace. Colors available in that palette is not enough for some situations. Since coreldraw already have lot of color palettes for most situations  we don't need to worry about creating new color combinations. You can follow instructions in the video bellow, if you don't know how to add new color palette to corel draw workspace. In this tutorial I am going to show you how to add new color palette to CorelDraw.


Thanks for watching.

Tuesday, September 9, 2014

Jennifer Lawrence Free CorelDraw Vector Art Template

jennifer lawrence vecter art template free corel draw

I vectored (trace) a Jennifer Lawrence image using CorelDraw X4. This is the image I use for trace.

jennifer laurance vecter art templete corel draw

Click here to download CorelDraw X4 file. Download Template
Wednesday, September 3, 2014

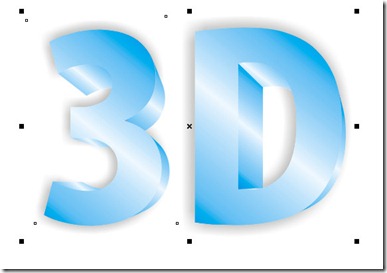
Corel Draw 3D Text Tutorial

3D Text Corel Draw
In this tutorial you will learn how to create 3D text with Corel Draw using Interactive Extrude Tool. I’m using coreldraw X3 in this tutorial. But you can use most of newer or older versions of Corel Draw without any problem.
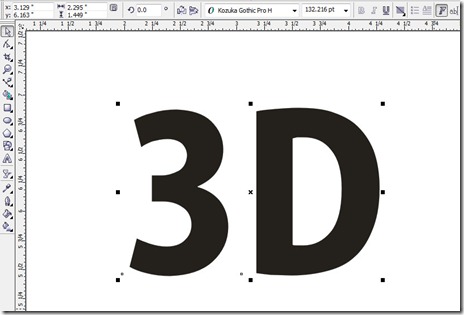
First of all type any text in Corel Draw using Artistic Mode. Bolder font is better.
Here what I type.
3D Text Corel Draw
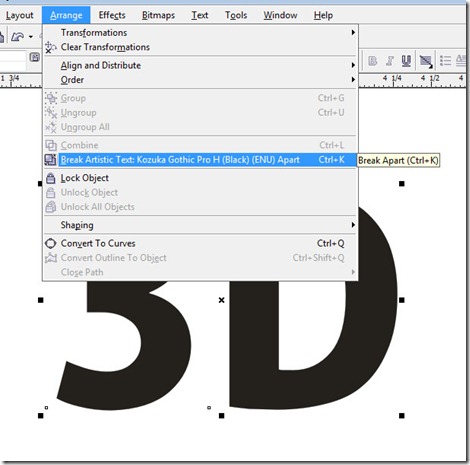
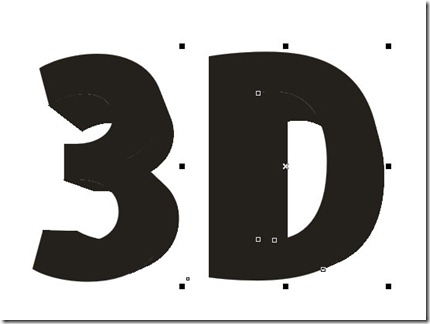
If you type more than one letter like me. Select the text and Press Ctrl+K to Break Artistic Text. If you just type one letter skip this step.
3D Text Corel Draw
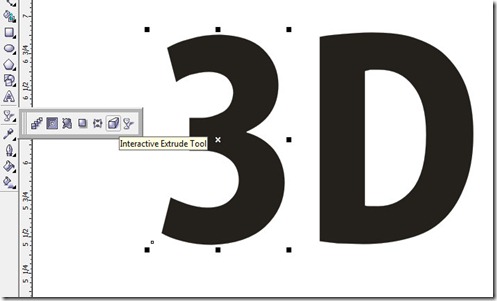
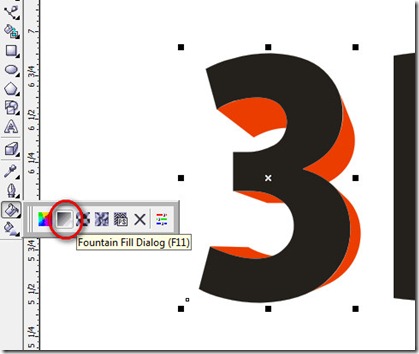
Select “3” using pick tool and choose Interactive Extrude Tool from the tool box.
3D Text Corel Draw
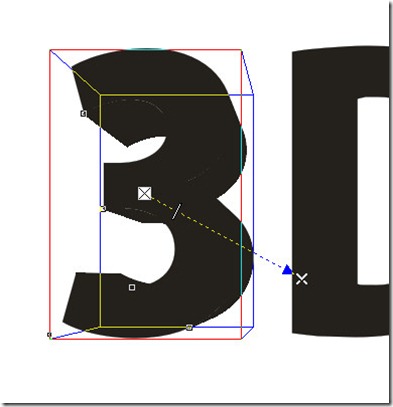
Give 3D effect to the letter using Interactive Extrude Tool like bellow.
 3D Text Corel Draw
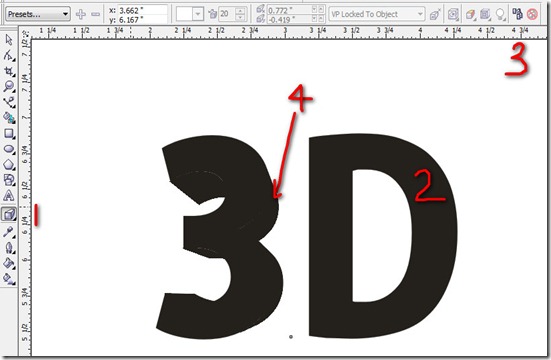
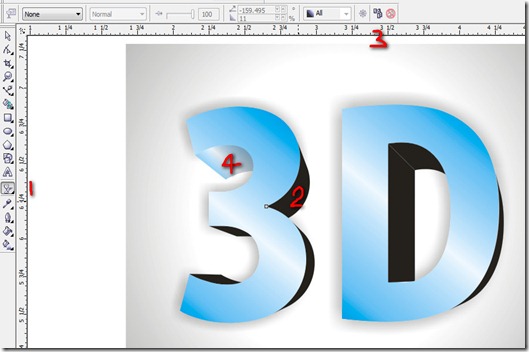
To give same effect to other letters follow the steps below.
1. Pick the Interactive Extrude tool.
2. Select the letter you want to give 3D effect.
3. Press “Copy Extrude Properties” button.
4. Click on the Extrude Property of the letter “3”. (Not on the surface of letter “3”)
 3D Text Corel Draw
If you do it right. you will get exactly same extrude property as previous.
 3D Text Corel Draw
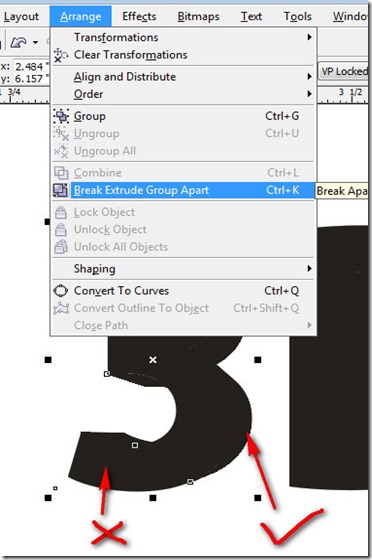
Now choose pick tool and select the Extrude area of the letter. If you select if right Break Extrude Group Apart option at Arrange menu will active. If it not active mean you didn’t select Extrude area correctly.
Press Ctrl + K to Break Extrude Group Apart.
 3D Text Corel Draw
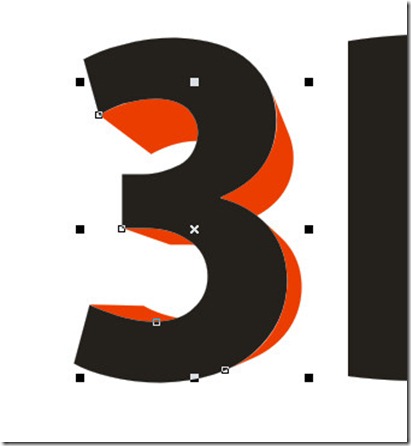
To view Extrude area easily give it a different color.
 3D Text Corel Draw
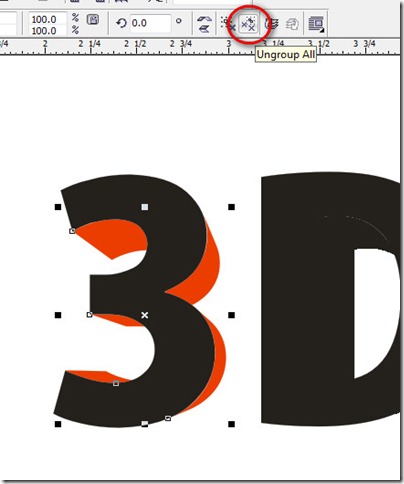
Select the extrude portion and press Ungroup All button at tool bar.
 3D Text Corel Draw
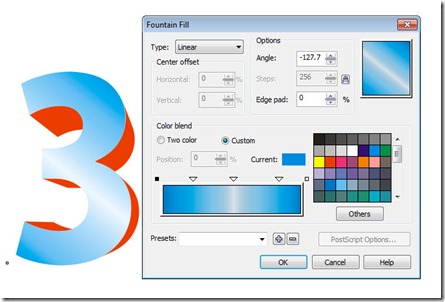
Now select letter “3”. Fill it with following gradient using Fountain Fill Dialog box.
 3D Text Corel Draw
3D Text Corel Draw
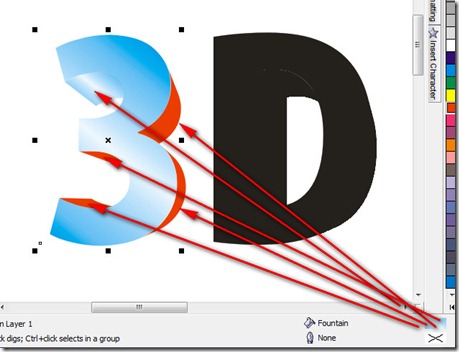
While select the “3” you can see a sample of gradient you just fill. Drag and drop the sample the every extrude area like below image.
 3D Text Corel Draw
If you do it right. You will get something like this.
 3D Text Corel Draw
Do the same for other letters.
 3D Text Corel Draw
Make a copy letter “3”. (Press + sign of Num pad to make a copy)
While selected the copy of letter 3 choose Interactive Drop Shadow tool. Choose Small Glow from presets. Set transparency to 22 and father to 14.
 3D Text Corel Draw
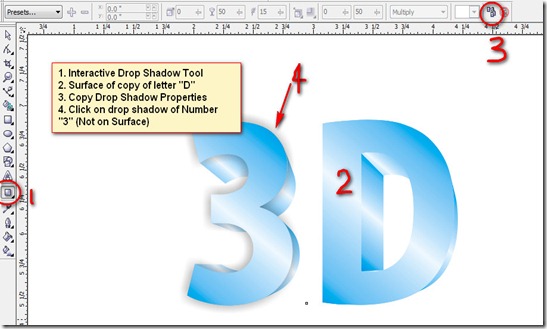
Make copy from each of letter and copy the same drop shadow property to them.
1. Pick the Interactive Drop Shadow tool.
2. Select the letter you want to give drop shadow.
3. Press “Copy Drop Shadow Properties” button.
4. Click on the Drop Shadow of the letter “3”. (Not on the surface of letter “3”)
3D Text Corel Draw
Now click on all the letter we give drop shadow. (Click on letters while pressing Shift button)
Send it to back of the all layers. (Press Ctrl + End)
 3D Text Corel Draw
Make a copy of each extrude area. (Press + sign of num pad)
Fill it with black color.
 3D Text Corel Draw
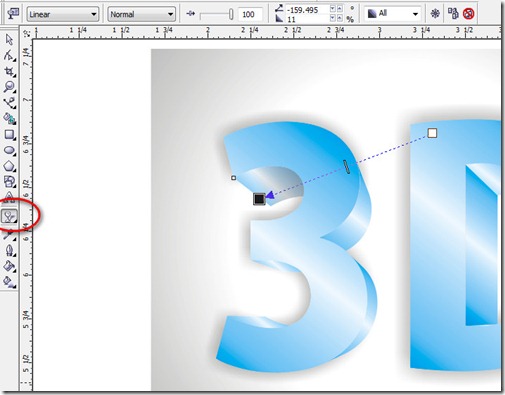
Now choose Interactive Transparency tool and give a linear transparency to it like bellow image.
3D Text Corel Draw
Do the same for copy of each and every extrude area.
 3D Text Corel Draw
You can copy the previous transparency to other extrude area.
1. Pick the Interactive Transparency tool.
2. Select the extrude area you want to give transparency
3. Press “Copy Transparency Properties” button.
4. Click on the extrude area of previous transparency given.
3D Text Corel Draw
Here is the final result.
 3D Text Corel Draw
 3D Text Corel DrawThank you for reading my tutorial.

Click here to download the corel draw file. Download

You Might Like

Related Posts Plugin for WordPress, Blogger...