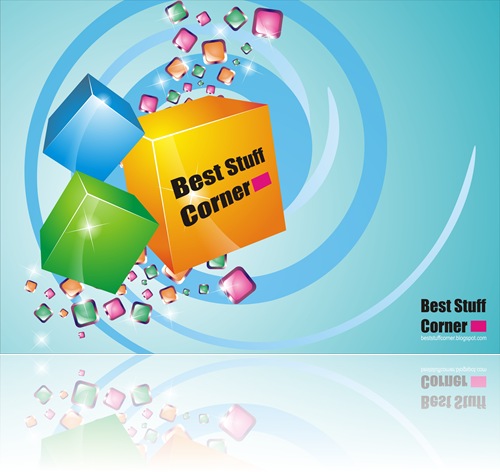
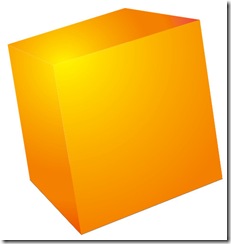
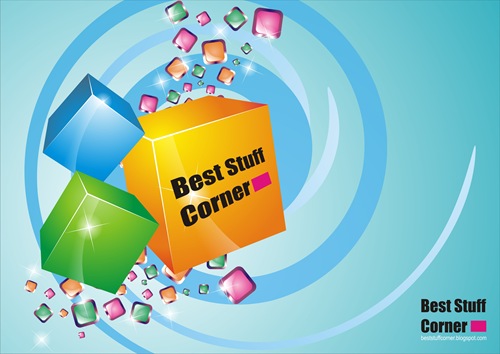
In this tutorial you are going to learn how to create beautiful 3d box design using corelDRAW. This tutorial will not be hard, If you followed my previous tutorials. All main steps need to complete this tutorial are stated below. Lets get start.
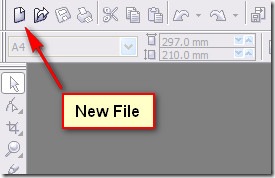
First of all open corelDraw program. I’m using corelDRAW X3 in here. Create a new sheet as shown below image.
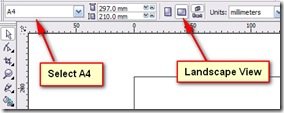
 Set paper size to A4 and orientation to landscape.
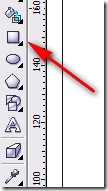
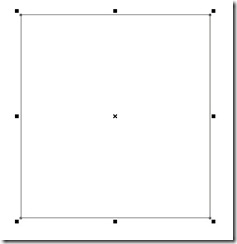
Draw a square using rectangle tool in the tool box.
Press and hold Ctrl key while drawing the rectangle to make it square.
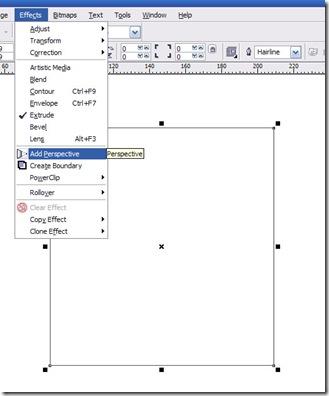
Select Add Perspective from the effect menu.
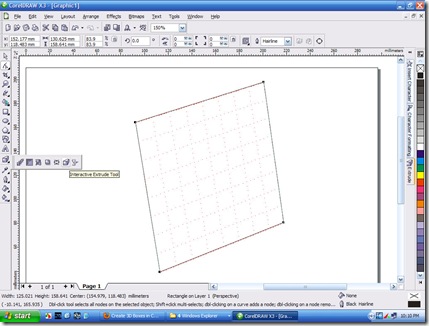
Click and drag from the corners of the square to form following shape.
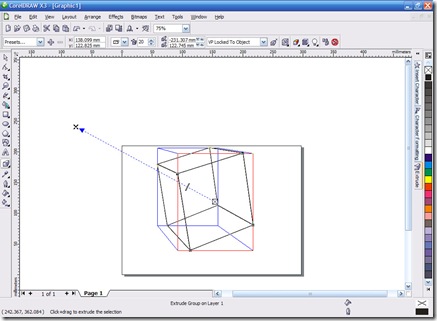
After that select Interactive Extrude Tool from the tool box which is at the left side. Drag the box to the left upper side to crate the following extrusion effect.
Now select whole object and select Break Extrude Group Apart from the Arrange menu or just press Ctrl + K
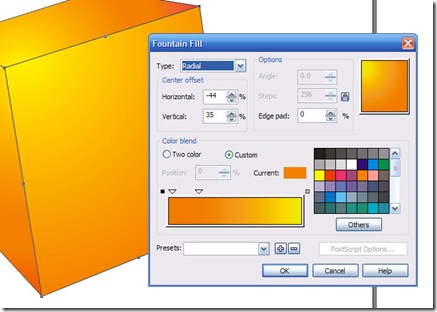
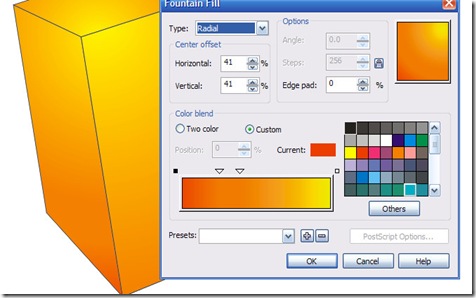
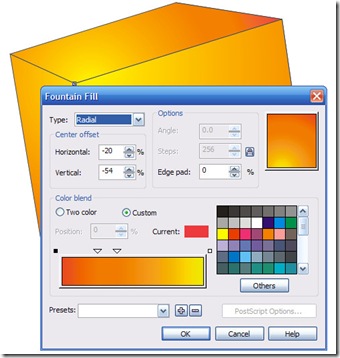
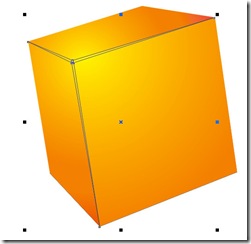
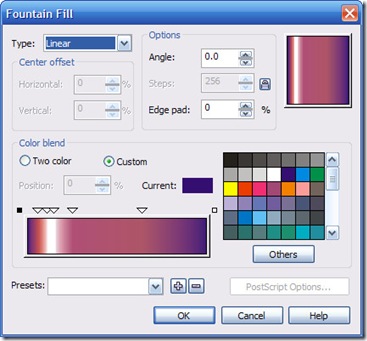
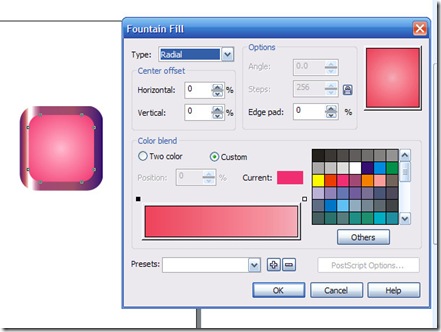
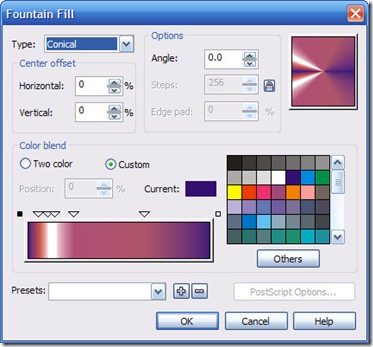
Now you can select each side of the box separately. Fill front, left and upper side of the box using fountain fill tool box as below.
Front Side
Left Side
Upper side
After that remove outlines of the box. (Right click on the Cross mark on the color palate)
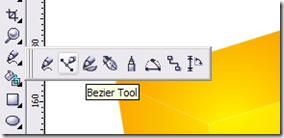
Now we are going to do small drawing using Bezier tool.
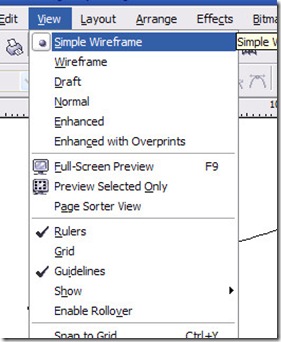
If we choose simple wire frame form the view menu, it will be easy to draw.
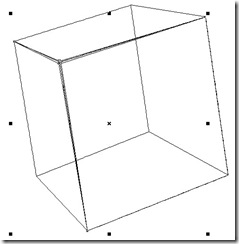
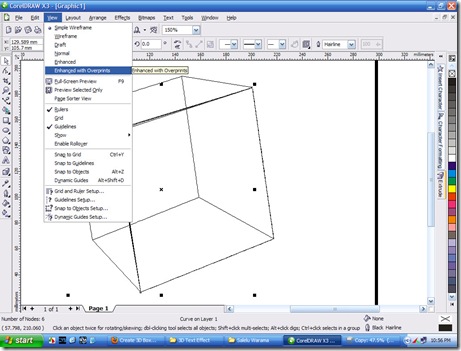
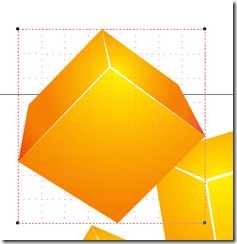
Draw outlines of the box as below and after that we can change back it to regular view.
Now fill the outlines of the box with white color. Group all the objects.
Make a small version of our 3D box and place it like below image.
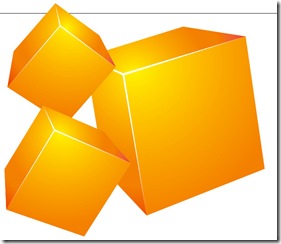
Make a another copy of box and place it as below. It may need to adjust the perspective from the effect menu.
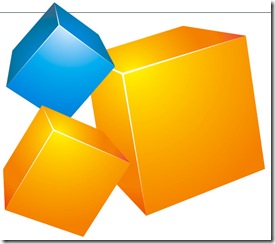
Now we have total of three 3D boxes.
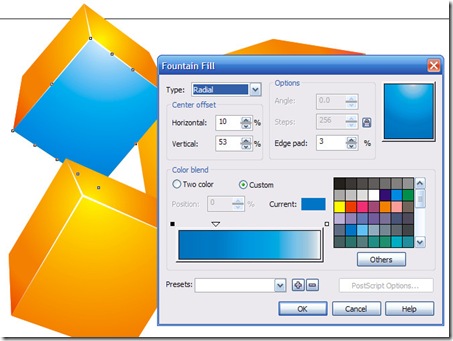
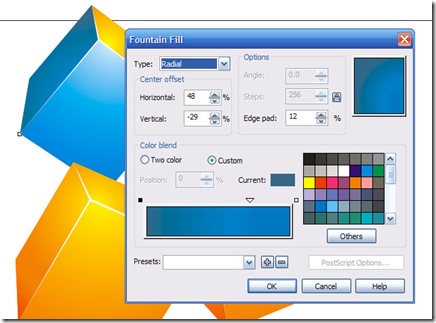
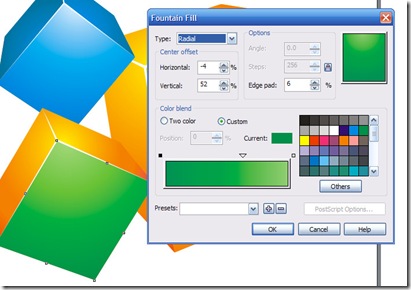
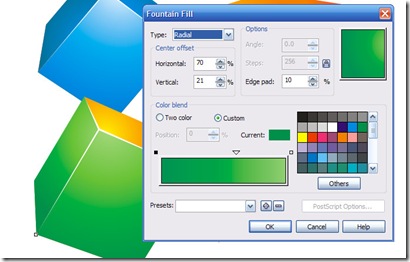
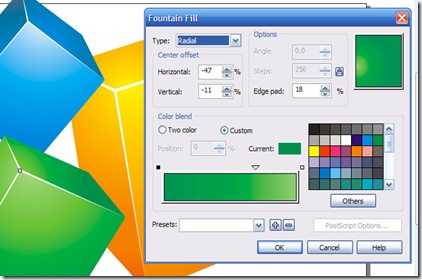
Ungroup all boxes and change the colors of it. I’m giving blue color to one and green to other. You can choose your own color combinations. Always use fountain fill dialog box.
You can use same values as shown in images.
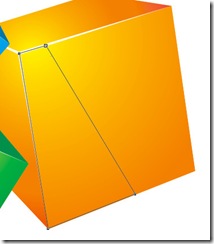
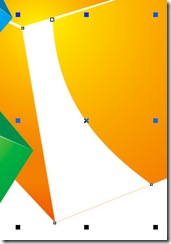
Now all boxes are filled. Now we are going to give shiny transparent effect to our 3D box. Create a custom shape like this using “Bezier Tool”.
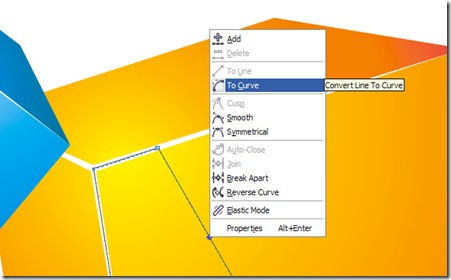
Using shape tool change the shape of it as below. We need to convert to curve before change the shape.
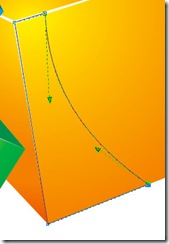
This is the shape that we have to make.
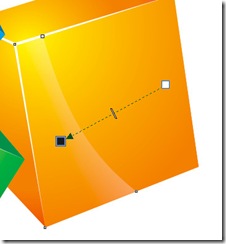
Fill the shape using white color.
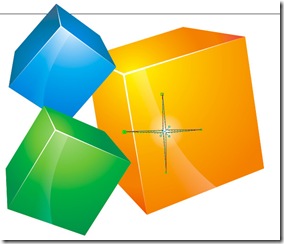
Give leaner transparency using “Interactive Transparency” tool at the left side.
Follow the above procedure and give above effect to other boxes too.
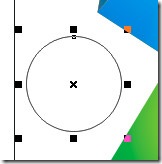
We are going to make few sparkles an pace it on appropriate place to get more shiny looking boxes. Create a circle using “Ellipse Tool”.
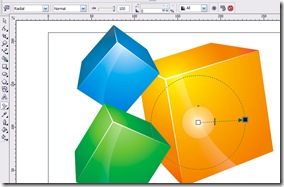
Fill it with white color. Give radial transparency to make it’s outlines disappear.
This is what you have to do.
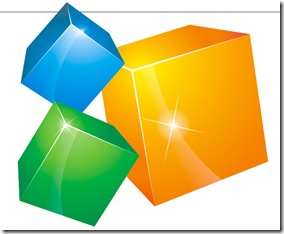
Now create a star shape using “Bezier Tool” as below. Place it middle of the circle and and fill it using white. After drawing basic shape we can shape it as we want using “Shape Tool”
Fill the star shape with white color.
Select circle and star shape. Group it and get few copies of it.
Now we are going to make bunch of rectangles to fill background.
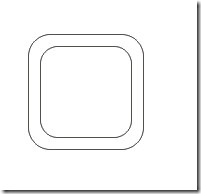
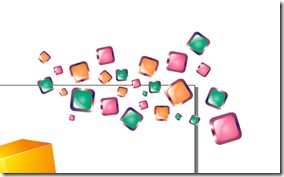
Create square and round the corner as below.
Get a copy of this square and reduce its size by little bit. Place it inside.
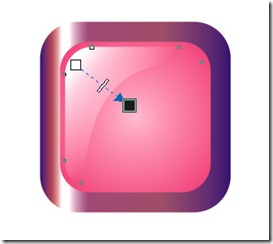
Fill the large one using “Fountain Fill” tool as below.
Here is how i am did it.
Fill the middle square as below.
Draw shape like below using “Bezier Tool”. Fill it with white color. Give a transparency to it using “Interactive transparency tool”
Make a few copy of it and change the color by little bit.
As you can see I change my mind during this and change the color of large one to something like below.
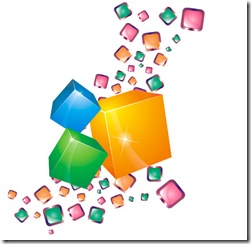
Make few copies of them and change the size and rotate it little bit. Now place it randomly
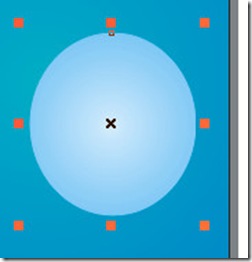
To make suitable background create a rectangle and fill it using dark and light blue color. Draw a circle using “Ellipse Tool”. Fill it with dark and light blue colors as below.
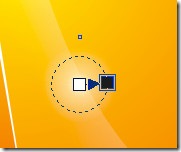
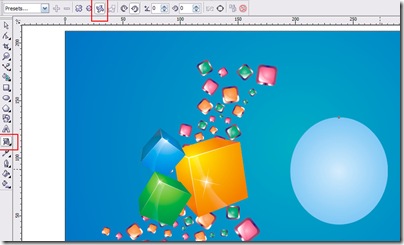
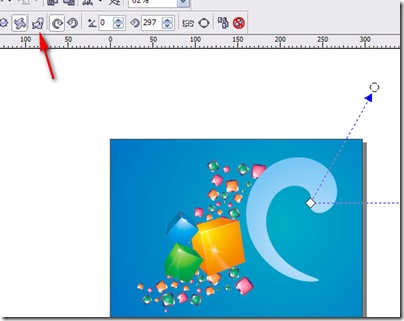
Now we are going to change the shape of it using “Interactive Distortion Tool” as shown in below image.
Using this tool hold and drag from the circle. Make some thing like this.
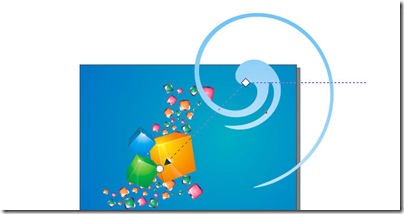
Now click on the new distortion button as shown using arrow in the above image. After that give another little bit of distortion.
Make another one and place all the content inside the rectangle using power clip option at the effect menu.
Download CorelDRAW X3 .cdr source file. Click here.








A "box design tutorial using CorelDRAW" is a guide or instructional material that explains Should Eliminate Games how to create a design for a box using the graphic design software CorelDRAW.
ReplyDeleteBox design tutorial showed me new tricks and techniques. The tutorial's emphasis on graphics and layout was enlightening. Why Lagging Game My packaging now looks more professional and eye-catching.
ReplyDeletehttps://bayanlarsitesi.com/
ReplyDeleteOrdu
Kocaeli
Düzce
Osmaniye
PCSD3
Ankara
ReplyDeleteAntalya
istanbul
Ordu
izmir
BQAR
aydın evden eve nakliyat
ReplyDeleteyozgat evden eve nakliyat
kırklareli evden eve nakliyat
antep evden eve nakliyat
konya evden eve nakliyat
OZSS
D09F7
ReplyDeleteErzurum Parça Eşya Taşıma
Afyon Lojistik
Kocaeli Lojistik
Bitlis Lojistik
Erzurum Evden Eve Nakliyat
13D39
ReplyDeletehalotestin for sale
Sakarya Evden Eve Nakliyat
Tekirdağ Fayans Ustası
Çankırı Evden Eve Nakliyat
Zonguldak Evden Eve Nakliyat
order testosterone propionat
buy masteron
Kütahya Evden Eve Nakliyat
İstanbul Evden Eve Nakliyat
7DBC5
ReplyDeleteAfyon Evden Eve Nakliyat
Etlik Parke Ustası
Ankara Lojistik
Çanakkale Lojistik
Bilecik Parça Eşya Taşıma
Bitlis Parça Eşya Taşıma
Lovely Coin Hangi Borsada
Karapürçek Fayans Ustası
Yozgat Evden Eve Nakliyat
65BE6
ReplyDeleteÇerkezköy Kurtarıcı
Kırklareli Şehirler Arası Nakliyat
Çerkezköy Yol Yardım
Edirne Evden Eve Nakliyat
Ordu Şehir İçi Nakliyat
Van Şehir İçi Nakliyat
Nevşehir Şehir İçi Nakliyat
Pi Network Coin Hangi Borsada
Muş Parça Eşya Taşıma
9245D
ReplyDeleteparabolan
order masteron
buy pharmacy steroids
Silivri Fayans Ustası
trenbolone enanthate
anapolon oxymetholone
Kayseri Evden Eve Nakliyat
pharmacy steroids
order steroids
A21A0
ReplyDeletekomisyon indirimi %20
22560
ReplyDeletebilecik mobil sohbet chat
trabzon nanytoo sohbet
kilis mobil sohbet bedava
yabancı canlı sohbet
zonguldak sohbet
bedava sohbet chat odaları
elazığ canlı sohbet bedava
canlı sohbet sitesi
canlı görüntülü sohbet siteleri
B5907
ReplyDeletebursa sohbet sitesi
kayseri mobil sesli sohbet
canlı görüntülü sohbet uygulamaları
aksaray sohbet sitesi
siirt sesli sohbet siteler
telefonda canlı sohbet
ığdır parasız sohbet
ücretsiz görüntülü sohbet
bursa sohbet chat
E73D8
ReplyDeleteburdur canlı görüntülü sohbet odaları
antalya canli sohbet chat
Sivas Sesli Sohbet Sesli Chat
en iyi ücretsiz sohbet siteleri
yabancı görüntülü sohbet siteleri
osmaniye bedava görüntülü sohbet
Rize Sesli Sohbet Sesli Chat
diyarbakır sesli sohbet uygulamaları
canlı sohbet siteleri
3FF30
ReplyDeleteseslı sohbet sıtelerı
nevşehir rastgele görüntülü sohbet ücretsiz
Bilecik Canlı Görüntülü Sohbet Odaları
denizli canlı sohbet odaları
görüntülü sohbet kadınlarla
Sivas Canlı Sohbet
bartın kadınlarla rastgele sohbet
ankara en iyi ücretsiz sohbet siteleri
izmir mobil sohbet siteleri
342BA
ReplyDeletegoruntulu sohbet
sakarya canlı görüntülü sohbet siteleri
yozgat canli sohbet chat
Diyarbakır Bedava Sohbet
antep en iyi ücretsiz görüntülü sohbet siteleri
yabancı görüntülü sohbet
Samsun Mobil Sohbet Chat
çankırı canlı sohbet sitesi
Kastamonu En İyi Görüntülü Sohbet Uygulamaları
7C8E7
ReplyDeleteKripto Para Madenciliği Siteleri
Parasız Görüntülü Sohbet
Ort Coin Hangi Borsada
Tumblr Takipçi Satın Al
Binance Yaş Sınırı
Tiktok İzlenme Satın Al
Coin Madenciliği Siteleri
Mexc Borsası Kimin
Aion Coin Hangi Borsada
A9DE5
ReplyDeleteBitcoin Kazanma Siteleri
Tumblr Beğeni Hilesi
Sui Coin Hangi Borsada
Binance Neden Tercih Edilir
Linkedin Beğeni Hilesi
Spotify Dinlenme Hilesi
Linkedin Takipçi Hilesi
Telegram Abone Hilesi
Xcn Coin Hangi Borsada
D5465
ReplyDeleteParasız Görüntülü Sohbet
Threads Takipçi Hilesi
Görüntülü Sohbet
Linkedin Takipçi Satın Al
Kripto Para Üretme
Bitcoin Oynama
Bitcoin Nasıl Kazanılır
Fuckelon Coin Hangi Borsada
Gate io Borsası Güvenilir mi